If you love the challenge of grid based logic puzzles you’ll love Arrow Web Logic Puzzles. Like many other grid based logic puzzles, this type of puzzle is solved by following logic.
This is one of my personal favourites and I find arrow web logic puzzles engaging while also being quite relaxing to do. There isn’t a lot of information out there about this puzzle and there are a few logic puzzles featuring arrows, which means finding more detailed walkthroughs or explanations is difficult. However this is how I complete arrow web logic puzzles. I’ve included a look at the rules as well as a more detailed walkthrough.
What are Arrow Web Logic Puzzles?
Arrow web logic puzzle are a fun and relatively straightforward grid logic puzzle where there’s only one rule!
Every arrow (shaded or not) on the grid must point to one shaded arrow.
And that’s it!
There’s no maths or numbers involved, just following the direction of the arrows on the grid.
The challenge comes from ensuring that the rule is maintained while the puzzle is completed – and making sure that every arrow points to one shaded arrow – and only one.
How to Solve Arrow Web Logic Puzzles
I’m going to start with a tip which I haven’t seen anywhere else, and that’s to use a pencil or different colored pen to mark when an arrow is pointing to a shaded arrow. In the walk through I’ve colored the arrows – but I was doing the puzzle on my ipad so it was easy to delete the color if necessary. If I was doing this on paper, I’d use a pencil to mark the arrow.
Why is this useful? For one, it makes it really clear which arrows are pointing at a shaded arrow – and remembering the rule that each arrow must point at ONE shaded arrow, it means that all arrows in a straight line following the pointed direction of the arrow in question, cannot be shaded (otherwise this would mean the arrow was pointing at two or more shaded arrows).
In addition, it gives you a visual indicator of when the puzzle is complete and every arrow is pointing at a shaded arrow.
Important: Remember that at the start of the puzzle, when you mark an arrow to show it is pointing at a shaded arrow, it may itself be shaded later, so use a pencil or something you can shade over if it is later to be shaded.
I also indicate when we know that arrows can’t be shaded.
Arrow Web Logic Puzzle Walkthrough
As with all logic puzzles, start with the obvious – so look for where there is only a single option. Here, you can see that there is only one arrow pointing up in this line and one arrow pointing down. They are both pointing at each other therefore if they are both shaded, it adheres to the rule ‘each arrow (whether shaded or not) must point at one shaded arrow).
As we know that the arrows in between these two arrows cannot be shaded (otherwise the arrows would be pointing at more than one arrow), I’ve marked with red dots the arrows we know can’t be shaded.
To keep track of arrows which are pointing at a shaded arrow, I’ve colored these in blue. A pencil mark might be easier if you are using paper.
Remember that arrows that I’ve marked as pointing to a shaded arrow can themselves be shaded later if necessary.
Work through the grid looking for obvious ‘one option’ arrows. For example, at the bottom of the puzzle here we can see that there is one arrow pointing at the last arrow in the row. This means that last arrow HAS to be shaded.
Note that the arrow above the newly shaded arrow is now pointing at this shaded arrow too.
Tip: Look at the second row/column in from the edge and shade any arrows which they are pointing to at the edge.
Remember that each arrow can ONLY point to one shaded arrow. In this example, both of these arrows can not be shaded otherwise the arrow pointing up (third from bottom) will be pointing to two shaded arrows.

Continue working through the grid. Note how the red dots and the colored arrows make it easier to see the progress of the puzzle at a glance.
As you shade more arrows remember to keep looking up the lines, horizontal/vertical and diagonal. No more arrows can be shaded between these two arrows as it would mean that they would each point at more than one arrow.
Here’s how adding dots or indicators to cells containing arrows you know CAN’T be shaded is useful. It gives a clear visital overview of arrows which can be shaded. This is particularly useful when working on larger puzzle sizes.
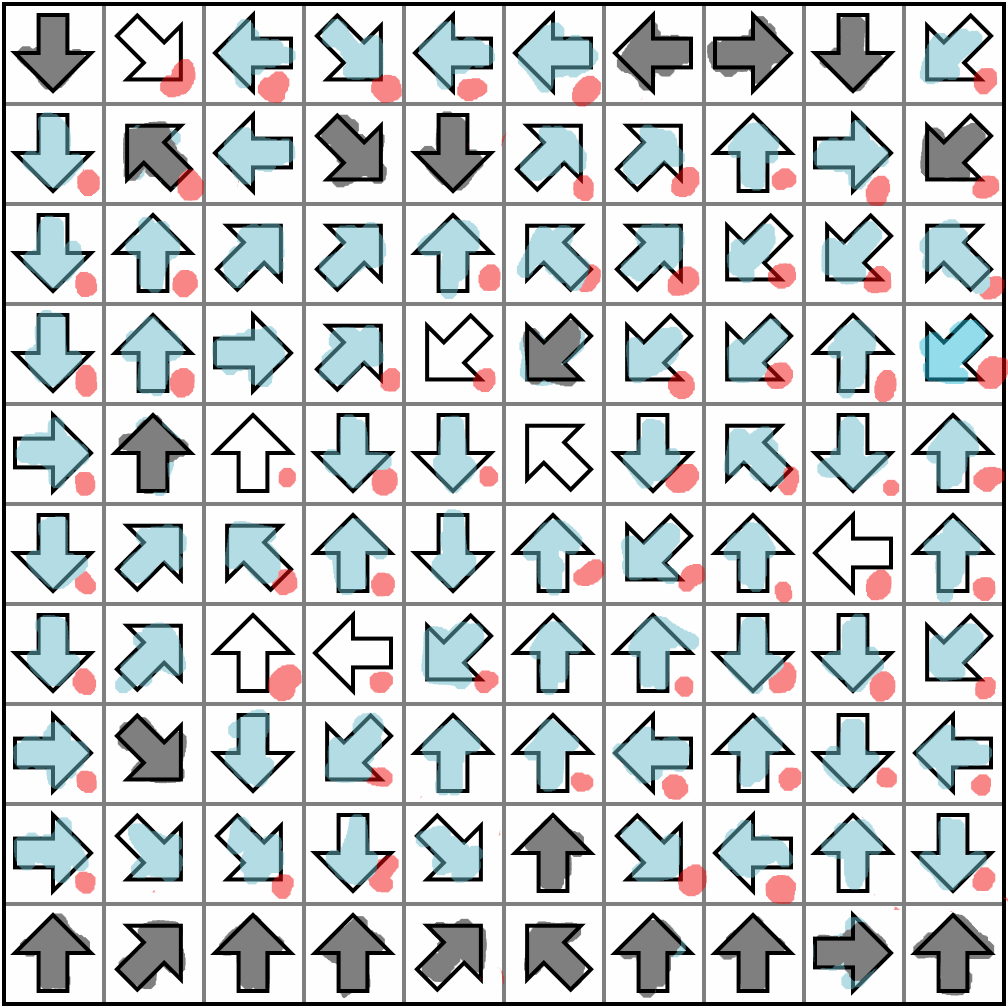
And this is why I personally find coloring the arrows that I already know are pointing at a shaded arrow as, again, this gives a clear view of what’s left to be completed. We know that the arrows still left white in the grid need to be pointing to a shaded arrow. Therefore we know where new shaded arrows need to be added.

The completed puzzle

